Stop overpaying - start transferring money with Ogvio. Sign up, invite friends & grab Rewards now! 🎁
In the world of crypto wallets, there are some platforms that stand out from the crowd, due to some unique features that they offer. SafePal is one such wallet - I’ve outlined the unique properties of this specific project in my SafePal review, which you can check out here. In this article, I’ll guide you through the process of how to use SafePal - well, at least two of the wallet’s versions.
To be a bit more specific, we’ll look into the app and browser extension versions of the wallet. There’s also a hardware SafePal wallet that you could purchase, as well, but this is a topic for a different article, altogether.
For the sake of keeping things as concise and clear as possible, I’ll assume that you’ve already read my aforementioned SafePal review, or that you know a bit about SafePal, in general. Thus, I won't go too deep into questions such as “is SafePal safe?”, or “what is SafePal?” - instead, we’ll cover the project from a very general perspective, and move straight to the how-to section of the guide.

Did you know?
Subscribe - We publish new crypto explainer videos every week!
What is a Crypto Airdrop & How to Get FREE Coins? (Animated)


Table of Contents
- 1. A Short Introduction to SafePal
- 1.1. How to Use SafePal: A Step-by-Step Guide
- 1.2. SafePal as a Browser Extension
- 1.3. SafePal as a Mobile Wallet
- 1.4. A Few Words on the SafePal S1 Hardware Wallet
- 2. How Does SafePal Compare to Other Popular Wallets?
- 2.1. SafePal VS Ledger
- 2.2. SafePal VS Trust Wallet
- 2.3. SafePal VS Ellipal Titan
- 3. Conclusions
A Short Introduction to SafePal
Before we jump into the core topic, and look into how to use SafePal, let me give you a quick overview of what the platform is all about, and why it’s worth looking into, in the first place.
Latest Ledger Flex Coupon Found:Well, it’s an overview for anyone who’s still only semi-familiar with the project. If you already know what is SafePal, and are only looking for how to start using it, this will serve as a refresher!
In short, SafePal is a rather unique cryptocurrency storage project that consists of three wallets - a mobile app, a software wallet, and a hardware device. All three of these wallets are different in their design, but the core functionalities that they offer to their users are the exact same - top-tier security, in-wallet crypto trading and acquisition, staking, and so on.
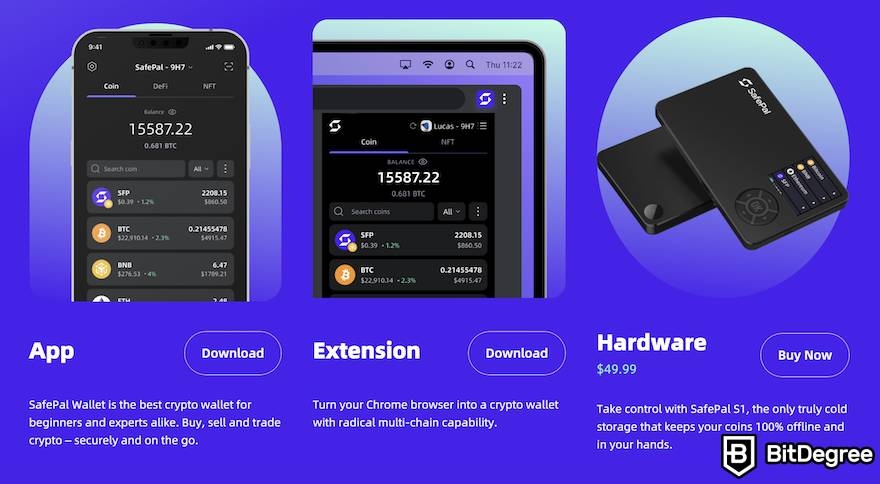
At its core, all three iterations of the wallet in question are pretty simple and straightforward to use, especially if this isn’t the first crypto wallet that you’re setting up. That said, if you’re a complete newbie, and have never used any crypto service before, things can still seem somewhat confusing, at first.
To add to that, SafePal is in a pretty unique position where it offers its users three different wallets that are all interconnected with one another - meaning, if you’re using the browser extension version of the wallet, you can also connect it to your hardware device or mobile app, and so on. For a newcomer, this might sound a bit intimidating.
Lastly, with SafePal staking, trading, and other features that the platform offers, there’s quite a bit to talk about, core wallet functionality aside. Thus, without further ado, let’s look into how to use SafePal, step-by-step.
How to Use SafePal: A Step-by-Step Guide
To start things off, let’s check out the browser extension version of the wallet. If you’re still concerned about is SafePal safe, or even what is SafePal used for, to begin with, now’s your last chance to hop onto my dedicated review, before we start talking about how to use SafePal.
SafePal as a Browser Extension
All set and ready to go? Great!
Step 1: First, navigate to the official website of the wallet in question. Here, at the top of the screen, you’ll notice a “Download” button - click it.
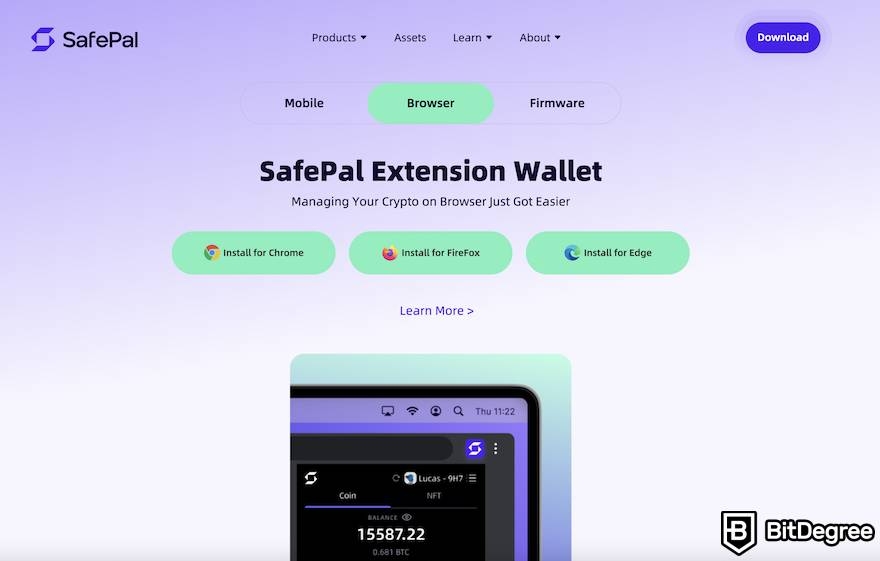
Step 2: In the new window that opens up, click on the “Browser” button in the middle of the screen, and then pick the browser that you’re using (Chrome, Firefox, or Edge).
Step 3: Next up, the process is exactly the same as if you were to install any other browser extension - simply add it to you browser of choice, pass a few confirmations, and bookmark it at the top of the page, if you plan to use it often.

Step 4: Now, you’ll want to click on the extension button of your SafePal wallet at the top of the page, read the general information, and select “Create a New Wallet”. You’ll be redirected to a password creation tab - make sure to create a unique and difficult-to-guess password!
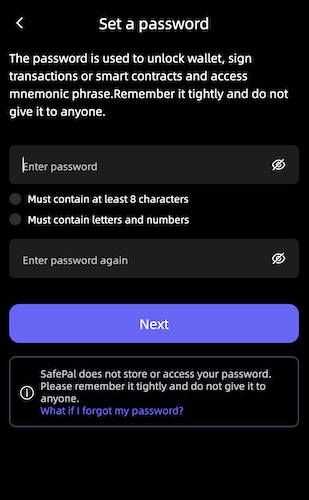
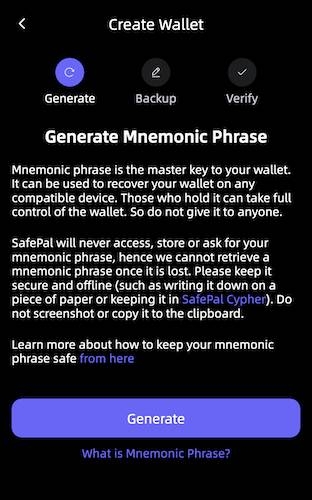
Step 5: The next step in learning how to use SafePal is to generate a mnemonic wallet phrase - a selection of 12 randomly-generated words that will act as the secret key to access your wallet, if you were to forget your password (or if there was a security breach). Generate the phrase, verify it, and make sure to save it - if you lose this combination of words, you might lose access to your crypto assets, forever!
Step 6: And so, you’re in - welcome to your SafePal wallet dashboard! This is the area where “all of the magic happens” - in other words, you’ll be able to access all of the features offered by the brand from this very screen.
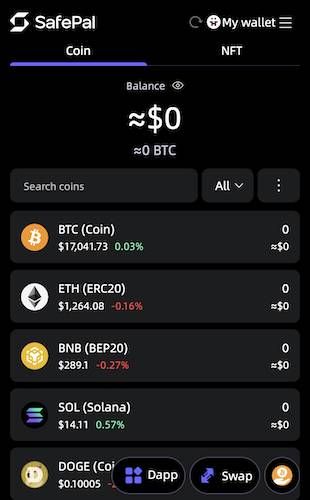
If you’d like to start receiving cryptocurrencies (find out your wallet address), or purchase crypto with fiat money (this is part of the “how to buy with SafePal” guide) via a credit or debit card, all that you need to do is click on the cryptocurrency of your choice.
You’ll be directed to the wallet interface of that specific crypto asset, where you’ll be able to copy your wallet address, or buy the coin or token directly from your wallet. It’s very simple, and quite self-explanatory.
Going back to the main dashboard, you will also notice two sections, at the top of the page - “Coin”, and “NFT”. This is important for anyone who wants to learn how to use SafePal for storing non-fungible tokens.
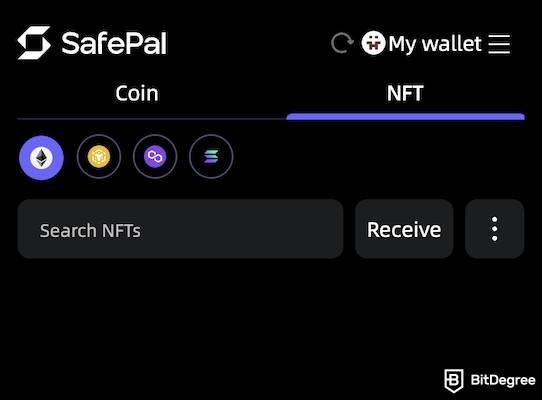
All that you need to do in order to receive NFTs is navigate to the NFT section, and click “Receive”. A QR code of your wallet (as well as a typed-out wallet address) will pop up, and you’ll be able to scan or copy it, and start receiving non-fungible tokens to your wallet immediately!
Then, of course, you have the rest of the features available with the browser extension wallet, such as dApp access, crypto swaps, and so on. The dApp screen will be empty at first, but you’ll be able to view and access all of your recent dApps, once you start connecting your SafePal wallet to them.
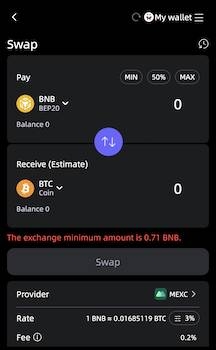
Swap-wise, you can choose two different cryptocurrencies from a huge list of swappable assets, enter the amounts that you’d like to swap, and perform it - if you have, say, 1 ETH, and you want to swap it for an equivalent amount of BTC (in USD), in a fast and efficient manner, this is the way to do it.
General feature variety-wise, that about covers all of the main things that you can do with the browser extension-based wallet - you now know how to use SafePal, at least as far as this wallet type is concerned!
Moving on, let’s now take a look at the mobile app version of the wallet, as well.
SafePal as a Mobile Wallet
It’s no secret that, as time goes on, mobile crypto wallets are becoming more and more attractive to crypto holders all around the world. If combined with some proper hardware and desktop-based crypto storage solutions (I’ll mention how to buy the SafePal hardware wallet a bit later), they can be amazing platforms to access and trade your crypto anywhere, and at any given point in time.
So - how to use SafePal, as a mobile wallet?
Step 1: First of all, you need to navigate to your app store, on your mobile device - that’ll be the Play or App store, depending on the operating system that your smartphone utilizes.
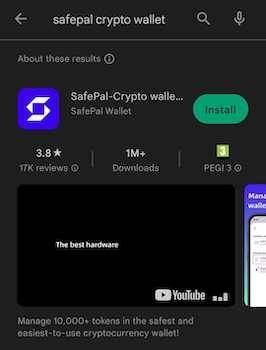
Once in the store, you’ll need to search for the SafePal crypto wallet - it should be the very first result. Make sure that you’re downloading the actual SafePal app, though, and not some shady lookalike!
Step 2: Once the wallet has been downloaded, you’ll need to manage the initial settings - fingerprint and dot-connection verification, specific agreements and verifications, and password setup.

Step 3: After all of that is done, you will now be asked whether you want to create a new wallet, or import an already-existing one. Since we already have an existing wallet (the browser extension one that we’ve created earlier in the “How to Use Safepal?” guide), I’ll show you how the importing route goes.
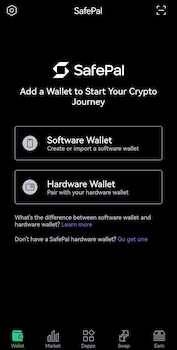
If you haven’t created a browser extension SafePal wallet, and are only looking to have a mobile storage solution, you can go ahead and create a new wallet - refer to the earlier chapter for a detailed guide on how to do so, since the steps for creating a mobile wallet are very similar to those of a software-powered one.
Step 4: You can choose a few different methods of importing an already-existing wallet, but the simplest one is to use the mnemonic phrase (set of 12 words) - simply enter them in the correct order (separated by spaces) in the field.
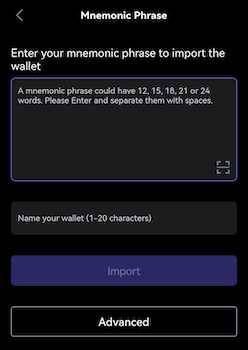
Once you enter the mnemonic phrase, and the name of your wallet, click “Import” - if all is correct, your wallet should be imported in a couple of seconds, with all of the original settings, balances, and information!
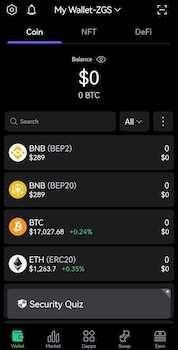
Many of the features that I’ve covered earlier in the “How to Use SafePal?” tutorial remain the same with the mobile version of the wallet, so I won’t go too deep into them. Instead, I’d like to point your attention to some additional functionalities available with the mobile SafePal wallet - market trades, a mobile-dedicated dApp section, and SafePal staking.
The Market tab in your wallet is where you’re able to buy, sell, and trade crypto (spot). This section acts like a cryptocurrency exchange - if you don’t want to use a dedicated exchange platform, and would rather do all of your crypto shopping and trading straight from your wallet, this feature is for you.

Simply find the token pair that you want to trade, click on it, and perform your transactions. The trading pairs on SafePal are powered by two established exchanges - Binance, and MEXC.
The dApp section looks a bit different than that on your browser extension wallet equivalent. On the mobile SafePal wallet, you can browse through some of the most popular decentralized applications in the industry, and connect to them straight from your wallet - once again, this is where SafePal emphasizes convenience for the user.

There are countless of different dApps to explore, ranging from DEXs and CEXs, all the way to crypto airdrops and lending platforms. You can browse applications from different blockchain networks, and favorite the ones you use the most.
Lastly, the final big notable feature that you’ll likely want to look into is the SafePal staking functionality. On a dedicated “Earn” section of your mobile wallet, you can stake your cryptocurrencies (specific coins and tokens), and earn a passive interest over time. The APYs vary depending on a wide array of factors, but potential earnings can get really high!
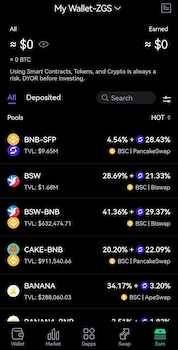
The rest of the SafePal mobile wallet works pretty similarly to any other type of software-based crypto storage solution out there - sending and receiving crypto is quite straightforward, so you don’t need to worry about some complicated settings that you’d need to sort out. There should be no situation where you’d find yourself asking - how to find SafePal wallet addresses and other important features!
A Few Words on the SafePal S1 Hardware Wallet
As I’ve mentioned at the beginning of this “How to Use SafePal?” tutorial, I won’t go into detail on how to use the hardware version of the wallet here - instead, this is a topic that would require a separate article, in its own.
What I *do* want to cover, though, is the process of how to buy SafePal S1, if you’re interested in trying out this version of the wallet.
What you’ll want to do is navigate to the company’s official website, and under the “Products” section, click the “Hardware Wallet” button. You will be redirected to a hardware wallet-dedicated page, where you’ll be able to both check out the wallet and all of its core features, as well as purchase the product for yourself, too.
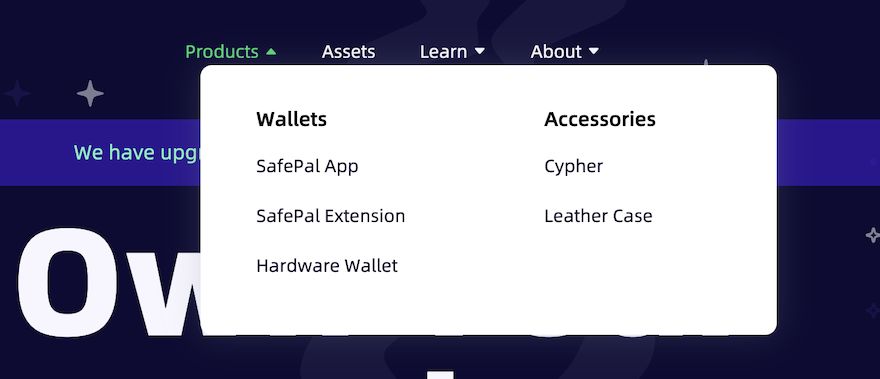
The page contains some additional physical products for you to browse through, as well - things such as a leather case and a cypher. If you purchase additional items, or even a couple of wallets, at the same time, you might get a really good deal!
Now, why am I even telling you about how to buy SafePal S1 - isn’t the process kind of evident? Well, not exactly - the reason is because some people prefer to go to third-party resellers, and purchase their wallets from them.
That’s something I would highly recommend you avoid doing. If you’re wondering why, it all boils down to security.
Wallets that are purchased from unauthorized dealers (such as a random person on eBay) can be tampered with. Perhaps the wallet is already set up, and once you transfer all of your crypto assets to it, the seller will simply use the original mnemonic phrase to recover it (in other words - steal your assets)?
Naturally, situations like these aren’t necessarily very common. However, whenever you’re dealing with a re-sold crypto wallet, you’re always facing this risk.
My message here is pretty simple - don’t get swayed by “a great deal”, and fall for a potential trap. Instead, purchase your hardware wallets from the official dealers (creators) of the product, so that you could rest assured that everything’s as it should be, and there’s no foul play involved.
Truth be told, this should be a no-brainer when it comes to this “How to Use SafePal?” tutorial, as well - with the SafePal hardware wallet product being so affordable (when compared to its competitors), there really are no corners that you should cut!
How Does SafePal Compare to Other Popular Wallets?
Before I let you go, there’s one more topic that I’d like to cover, in this “How to Use SafePal?” guide. This topic has to do with a question that’s rather popular among the users of either version of this wallet - “how does SafePal compare to X crypto wallet?”.
Indeed, with there being so many different cryptocurrency wallets available to be accessed, with just a single click of a button, picking just one or two can be difficult. In order to shed some light on the matter, let’s compare and contrast respective SafePal wallets to some of the platform’s main competitors, and see what the results are.
For the sake of keeping things in-line with the tutorial, we’ll mostly analyze things from a “how to use” perspective - thus, we’ll talk about the differences in usability, user-friendliness, feature variety, and so on.

Did you know?
Subscribe - We publish new crypto explainer videos every week!
What is Balancer in Crypto? Beginner Friendly BAL Explainer


SafePal VS Ledger
Probably the most common comparison that you’ll find online (as far as SafePal is concerned, that is) involves Ledger - specifically, the Ledger Nano X. It’s no secret that Ledger is one of the biggest hardware crypto wallet brands in the world - the Nano X is often hailed as the best wallet to hit the market, in general!
That’s a bold statement, though - let’s see how SafePal VS Ledger compare.
Functionality-wise, the SafePal S1 and the Ledger Nano X are quite similar to one another. Both wallets offer advanced features to their users, such as in-wallet crypto acquisitions, staking, and so on. While Ledger has an amazing custom user interface (called Ledger Live), SafePal allows you to perform most of the core processes straight within your wallet, via built-in buttons and a decently-sized display.
While the SafePal hardware wallet setup isn’t something that we’ve talked about in this “How to Use SafePal?” tutorial, I can tell you right now - the setup process of the product is as simple as they come. The same is true with the Ledger Nano X, as well.

While both wallets have made crypto storage very accessible to their users, the newcomers to the industry aren’t forgotten, either. If you’re wondering which SafePal VS Ledger Nano X wallet is better when it comes to general usability and newbie-friendliness, I can assure you - while SafePal might take a bit more time to figure out, both wallets won’t disappoint in this regard.
Both wallets are secure, well-built, and unique, in their own right. The one big area where they do differ significantly is the price - the Nano X is much more expensive.
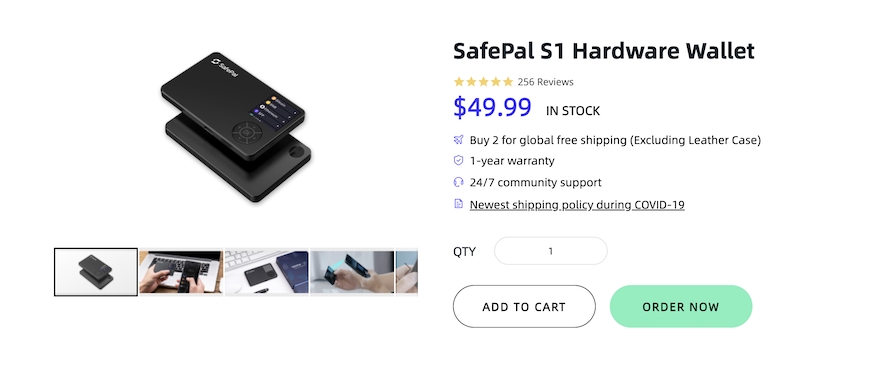
While the SafePal S1 currently retails at $49.99, you would need to pay $149.00 for the Ledger Nano X - that’s almost three times as much! Naturally, the wallet does have a huge and long-lasting reputation to back the price tag up, but this makes the Nano X to be far from many people’s budget.
If you don’t want to spend that amount of money on a crypto wallet, or are looking for some Ledger alternatives, then SafePal S1 is definitely a device worth checking out.
SafePal VS Trust Wallet
Another popular wallet that’s often mentioned with SafePal is the Trust Wallet - specifically, you’ll find many people looking for SafePal VS Trust Wallet comparisons on the web. So, let’s jump into it (note that we’ll be talking about the mobile versions of both wallets).
First and foremost, usability. While Trust Wallet has been around for a long time, using the two crypto storage solutions, you’ll quickly notice that SafePal offers a bit more of an optimized experience. The wallet dashboard offers a bit more information, and you’re able to access more features.
That’s another point, too - if you’re looking for staking, conveniently sorted dApp lists, or in-wallet trading usability, SafePal will often be the way to go, as far as these two wallets are concerned. While the Trust Wallet offers a lot of different features to its users, presentation-wise, SafePal is at the top.
Moving on, both wallets will offer crypto newbies a straightforward and streamlined experience, as far as setup and general usability are concerned. No matter which wallet you’d pick, you can be sure that it won’t be difficult to start using, either way.
In a very general sense, both SafePal VS Trust Wallet crypto storage options are quite similar. However, if you’re looking for advanced features, total (optional) anonymity, and a straightforward user experience, SafePal would be the right choice!

- User-friendly design
- Robust security
- Long battery life

- Dual auditable Secure Element chips
- Quantum-resistant protection
- Water and dust resistant

- Transaction Check feature
- Direct dApps connection
- Great middle-ground price
SafePal VS Ellipal Titan
Going back to hardware wallets, one more popular comparison is that of SafePal VS Ellipal Titan. Specifically, comparing the SafePal S1 hardware wallet with the Ellipal Titan physical crypto storage product.
Ellipal Titan is a really interesting wallet, firstly due to the fact that it resembles a smartphone. The wallet is very aesthetically-pleasing, yet features a rather bulky design.
This isn’t to say that SafePal S1 doesn’t have this issue, though - both wallets are, admittedly, a bit bulky, when compared to some of their competitors.
Neither SafePal, nor Ellipal Titan use NFC, Bluetooth, or WiFi. In other words, both devices are air-gapped - they come equipped with top-tier security features, which is certainly some great news for anyone who’s worried about this specific aspect of crypto storage.
While both wallets are somewhat similar in multiple different aspects (security, usability, feature variety, NFT support, and so on), the one big area where they differ is the same as with the SafePal VS Ledger Nano X comparison - the price tag.
As mentioned earlier in the “How to Use SafePal?” guide, the wallet in question is priced at $49.99. However, reading through some user SafePal VS Ellipal Titan comparisons, you will soon learn that the latter device starts at $139.00.
That’s a significant difference! Sure, you have a large display, and the wallet offers a different usability experience, but whether or not that’s worth the extra money, is up for the individual customer to decide!
Conclusions
So, then - that wraps up my guide on how to use SafePal, both when it comes to the browser extension version of the wallet, as well as the mobile app.
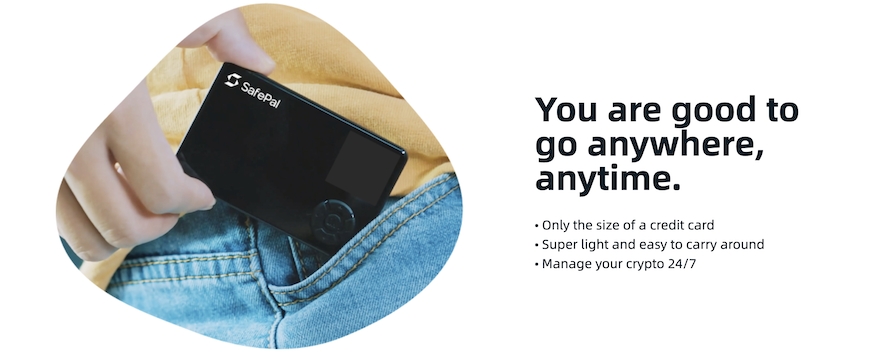
While we haven’t really touched on the hardware device available from the brand, if that’s something that you’re interested in learning more about, I might write a dedicated tutorial on the topic, as well. For now, just keep in mind that the SafePal S1 is both very simple to use and navigate, and is well-made, as far as hardware wallets go.
Going back to the topic at hand, while the app version of SafePal offers more features and functionalities, the browser extension could still prove to be a convenient way to access your crypto, and participate in different dApp-related activities. So, it’s a good idea to have both the mobile and browser extension versions of the SafePal wallet set up and ready to go!
Remember - if you’re still not sure is SafePal safe, or even what is SafePal, in the first place, I urge you to check out my dedicated review of the platform in question - you’ll find it here. Thanks so much for reading, and until next time!
The content published on this website is not aimed to give any kind of financial, investment, trading, or any other form of advice. BitDegree.org does not endorse or suggest you to buy, sell or hold any kind of cryptocurrency. Before making financial investment decisions, do consult your financial advisor.
