Stop overpaying - start transferring money with Ogvio. Sign up, invite friends & grab Rewards now! 🎁
Most software enthusiasts try tinkering with hardware at some point. Unfortunately, dissecting big devices like laptops and homeware appliances is a complicated feat for a beginner. In addition to that, it has its own risks, as there’s a chance of damaging expensive items beyond repair. Luckily, in recent decades, the dreams of those interested in simple hardware projects began to take form. Creative teams presented multiple tiny microcontrollers that provided a cheap and beginner-friendly way to experiment.
One of the most successful projects was Arduino, created for students in Italy in 2005. The main goal of its creators was to make working with electronics simple. You don’t need to have an engineering background or be a coding prodigy to use Arduino. Simple use allows thousands of people every year to create their own projects. Writing the instructions for the microcontroller in the abstracted Arduino language takes no time at all – let’s see how to do this ourselves.
Table of Contents
Arduino explained
Before we start learning about the Arduino language, we should be familiar with the system itself. Otherwise, we have knowledge with no practical use, and that is not our goal. In its essence, Arduino is a small and affordable piece of the so-called open hardware – a circuit board that you can use for simple electronic projects. You can join a few of them to build more complex structures as well.
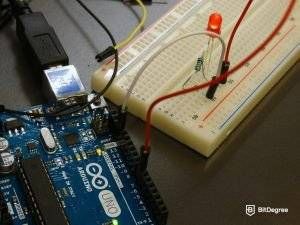
Latest DataCamp Coupon Found:There are a lot of different models of Arduino boards, as well as a whole variety of Arduino-compatible clone products, such as GSTduino, Freaduino, or CraftDuino. Their basic structure is rather similar. Any board you choose will always have a power connector, a serial connector, the primary chip, and a few smaller parts you don’t work with directly. In the newer models, though, a USB port can be used for both serial and power connections.
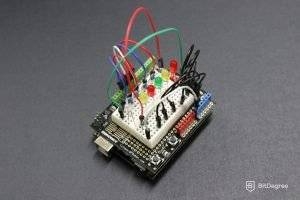
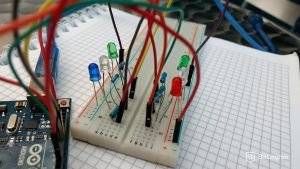
All boards have a set of pins as well. You can use them to connect the Arduino to external components, such as shields or sensors. A shield is a kind of an add-on board that can provide motor controls, LCD displays, and similar features. Using various types of sensors, your Arduino can detect pretty much anything (motion, sound, pressure, light, etc) and act accordingly (e.g., avoid obstacles when moving). Both shields and sensors are sold separately, but the prices are rather low: you can get a simple temperature or water sensor for just over three bucks.
Since Arduino’s creation in 2005, the combination of customizable hardware and abstracted software made it a hit among students, hobbyists, and DIYers. The technology is open-source and the documentation extensive, so the first steps aren’t intimidating to those without a background in programming or engineering.
Programming your board: IDE and Arduino language
To write your projects and upload them into your Arduino board, you will need to use Arduino software (integrated development environment, or IDE). The simplest option is to use the online version, also known as Arduino Web Editor. It allows you to use the cloud for storing your creations. This way, you can access them from anywhere, as long as you have a stable Internet connection. Using the online version also means you don’t have to worry about updates. If you prefer to use the offline version, you can download it for the official page.
Now, what language does Arduino use? Does Arduino use C++, or is there a separate Arduino programming language? These questions are among those most frequently asked by beginners. It’s only natural: as most of them don’t have much coding experience, simplicity is crucial for easy experimenting.
The syntax and naming of the Arduino language commands actually came before the hardware. Hernando Barragán created it in 2003, as he was developing a system called Wiring for his master thesis. During the research, he tested the language concepts with students of various programs: the language had to be abstract and simple enough for artists and designers as well as engineers.
We must note the fact that developers tend to disagree about the Arduino language – to be more precise, some insist it’s not even a language. Due to its similarity to C++, some call it a library. However, in this tutorial, we’ll stick to the terminology used on the official page of the Arduino and call it the Arduino programming language.
Introduction to the Arduino language
Due to their simplicity, the programs you write using the Arduino IDE are called sketches. In their essence, they are text files written in Arduino language. To save and upload them to your Arduino board, you will need to use the .ino extension.
There are three main parts that make up the Arduino programming language. First of all, you have functions that allow you to control your board. Using functions, you can analyze characters, perform mathematical operations, and perform various other tasks – e.g., digitalRead() and digitalWrite() lets you read or write a value to a certain pin.
There are two functions that every sketch written in Arduino language contains. Those are setUp() and loop(). A sketch always starts with setUp(), which executes once after you power-up or reset your board. After you create it, you use loop() to loop the program repeatedly until you power-off or reset the board.
Next, we have the Arduino values that represent constants and variables. Most of the data types (array, bool, char, float, etc.) are similar to those of C++. You can perform type conversion as well. The last part of the Arduino language is called structure. It contains small code elements, such as operators.
Syntax requirements
As for the syntax, it is not unlike that of C++. The first similarity you might notice is the use of curly braces to wrap your code blocks. If you miss a closing curly brace after using the opening one, the system will throw an error. Thankfully, the Arduino IDE will highlight the closing brace if you click on the opening one, so its a rather simple thing to check. Just like C++, Arduino also requires ending your statements with semicolons. Missing one causes an error to fire.
One more clear similarity is the way you enter comments. There are two ways to do this in Arduino language, based on whether you need a single-line or a block comment. If you only need to comment out one line, start it with two forward slashes:
// a comment here

#define LED_PIN 5

void setup() {

pinMode(LED_PIN, OUTPUT);
If one line is too little for your notes, you can insert a multi-line comment by starting it with a forward slash and an asterisk, and ending it with an asterisk and a forward slash:
/* a comment here

a comment there

there are comments everywhere */

#define LED_PIN 5

void setup() {

pinMode(LED_PIN, OUTPUT);
When you’re adding comments, remember that the Arduino compiler will ignore them completely. This means it will not export them to the processor and use any memory of the microcontroller.
Extending the Arduino programming language
Like most other coding languages, the Arduino language allows you to import external libraries. To put it shortly, a library is a set of prewritten code that provides you with extra features. If the built-in libraries are not enough for you, you can download them online or even write your own.
You can use both C libraries and ones that are Arduino-specific. After choosing one, you will need to install it using the Library Manager in the Arduino IDE. To include a specific library in your sketch, use the #include statement and name the library you need to use. Remember not to add a semicolon: this statement doesn’t need to be terminated.

Did you know?
Have you ever wondered which online learning platforms are the best for your career?
Before you go
As you might have already figured, an Arduino board is a great way to try playing with hardware without having to worry about significant expenses or complex programming. It’s a popular way to get children hooked onto engineering as well.
Will it be a family project? Will you be the next great inventor? Remember, every journey starts with a single step!
